
How to use the Meza Station website
Quick start
Meza Station is a catalog and marketplace for Pokemon Mezastar tags. Visitors can browse tags, inspect sell or trade boards, manage a collection, and contact sellers directly.
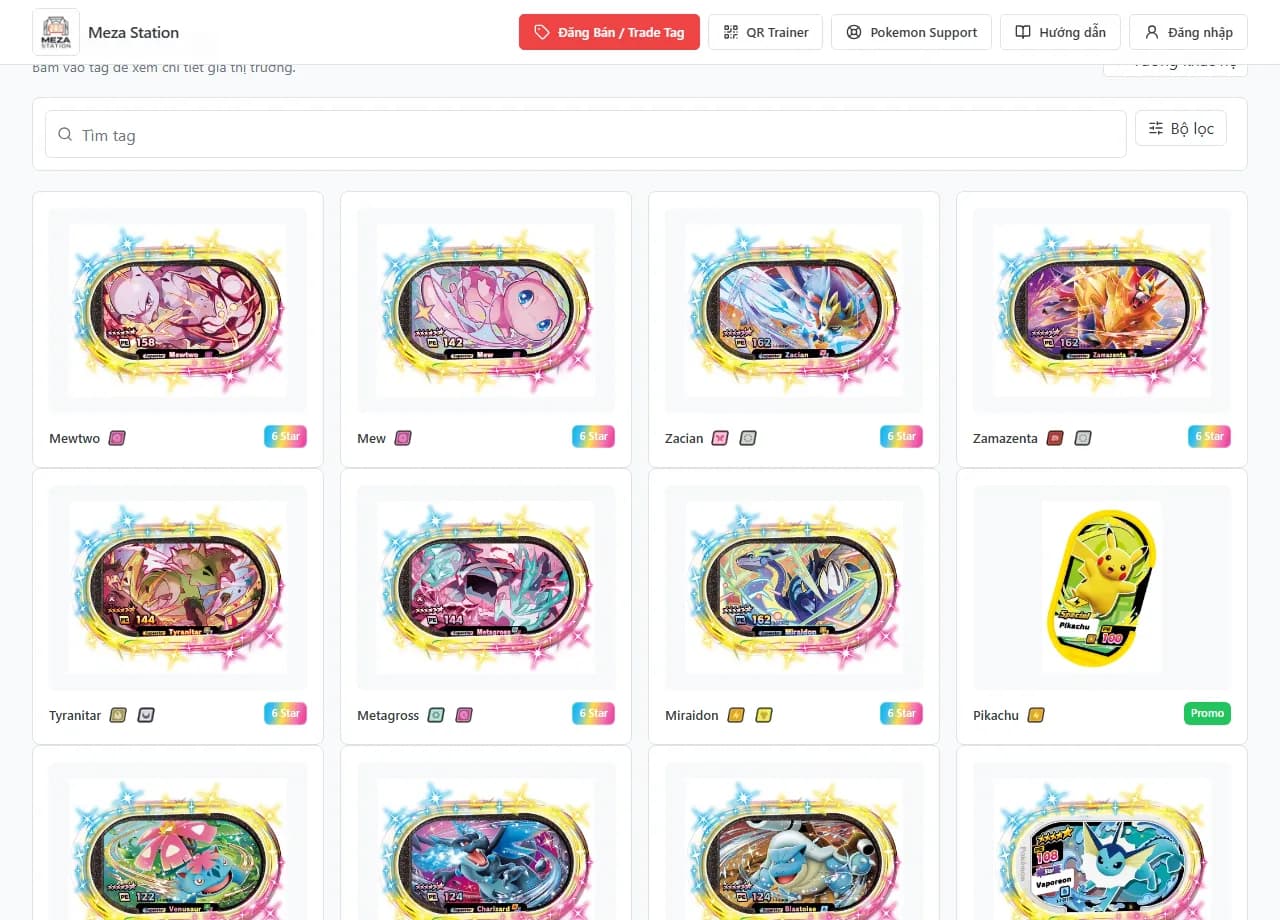
- 1Open the homepage or /tags to browse the full tag catalog.
- 2Use search, rarity, version, and Pokemon type filters to narrow the list.
- 3Open any tag to view details, the suggested price band, and the Sell / Trade Board.
- 4Sign in with Google if you want collection, QR Trainer, or sell/trade features.
The website only provides the catalog, collection, and listing surfaces. Buyers and sellers arrange the actual deal through Facebook or Zalo.
Sign in and profile
Signing in with Google unlocks personal features such as collection, listings, QR Trainer, and collection-based Battle Assist suggestions.
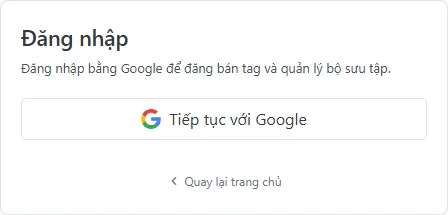
- 1Click Sign in in the header.
- 2Choose Continue with Google and complete authentication.
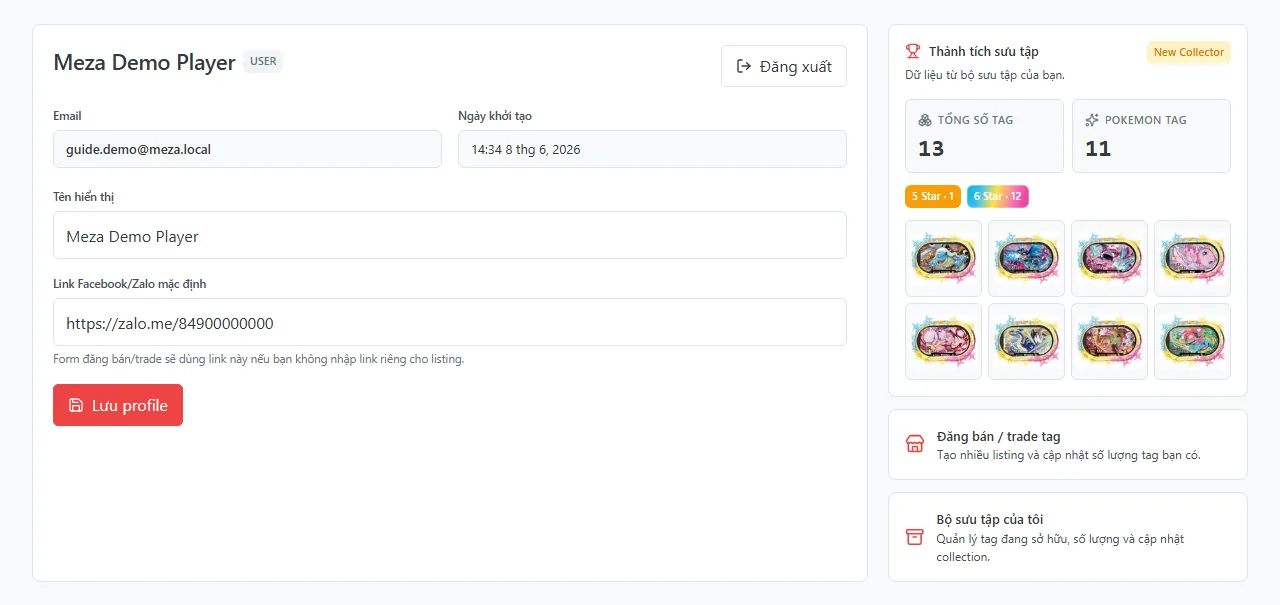
- 3Open the avatar menu and go to Profile.
- 4Update your display name and default Facebook or Zalo link if you sell or trade often.
The profile contact link is reused automatically when you create a listing unless you enter a listing-specific link.
Find tags in the catalog
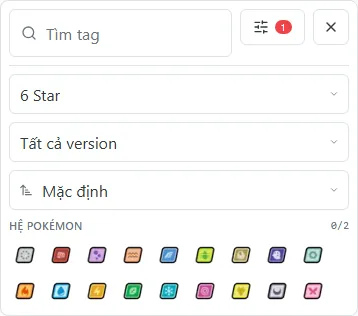
The catalog at /tags supports search by Pokemon name or tag code, with rarity, version, Pokemon type, and sort options.
- 1Type a Pokemon name or tag code into search.
- 2Open Filters to narrow by rarity, version, and up to two Pokemon types.
- 3Use Clear filters to return to the default list.
Open a tag and contact a seller
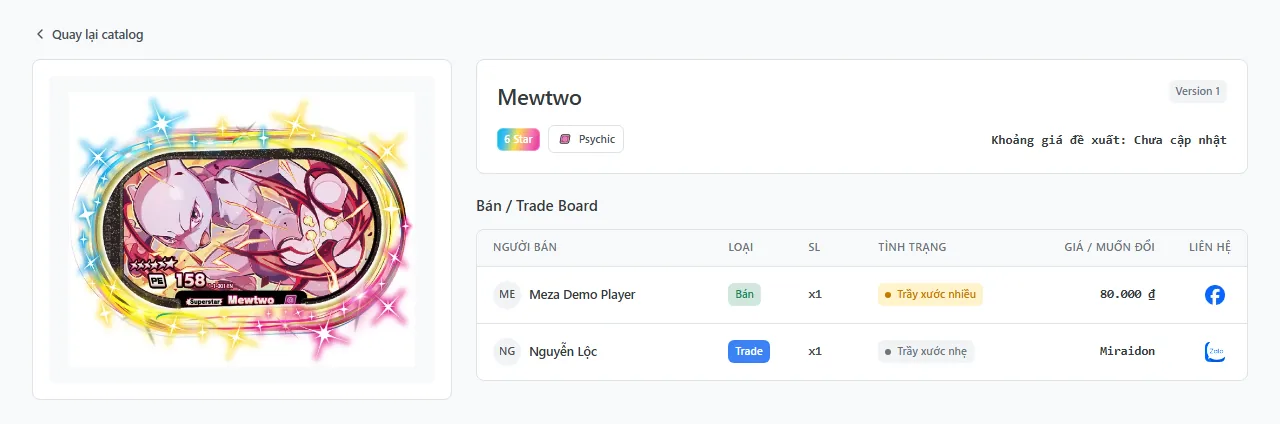
The /tags/[code] page shows the tag image, metadata, suggested price range, and the Sell / Trade Board for that tag.
- 1Open any tag from the catalog to view its detail page.
- 2Review rarity, version, Pokemon type, and the suggested price band.
- 3Check the Sell / Trade Board for sellers, listing type, quantity, condition, and either the price or wanted trade tags.
- 4Use the Facebook or Zalo contact button to open the seller channel directly.
Meza Station does not hold funds or guarantee trades. Check the tag condition, quantity, price, and seller credibility before paying or meeting up.
Manage your collection
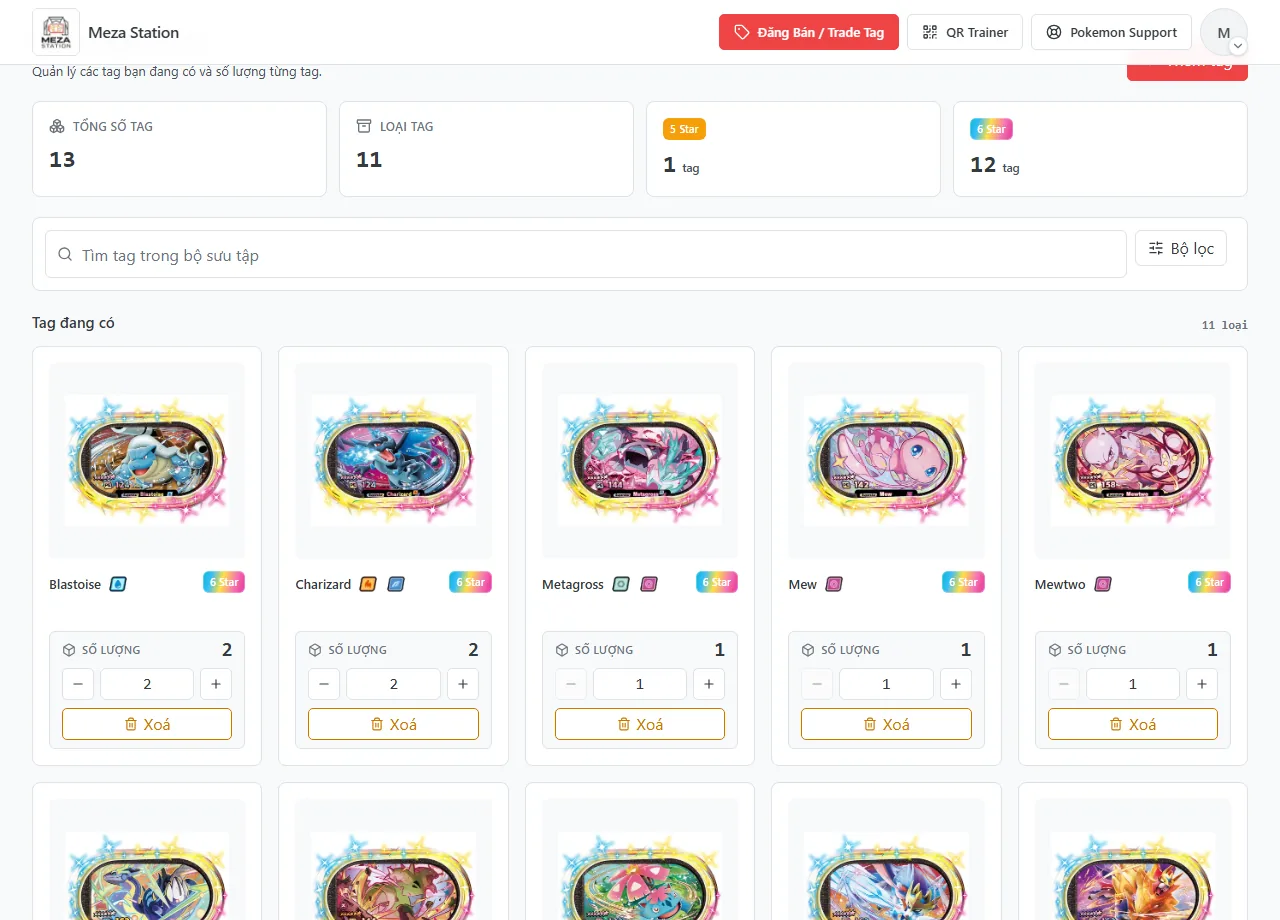
Collection at /collection stores the quantities of tags a user owns and acts as the source for sell or trade listings.
- 1Sign in and open Collection from the avatar menu.
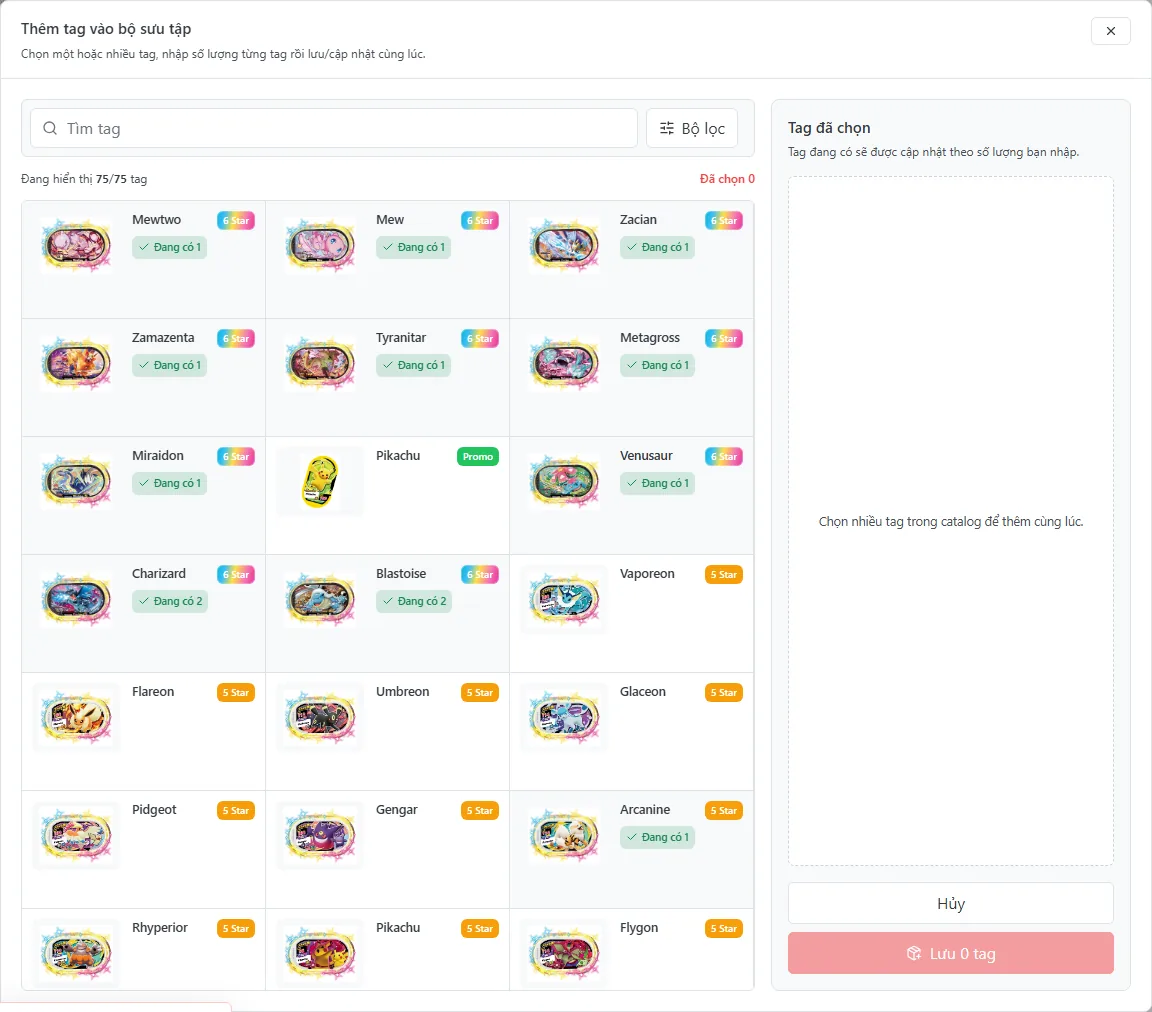
- 2Click Add tag to open the catalog-based picker modal.
- 3Select one or more tags, enter quantities, and save.
- 4Use the Missing Tag bubble in the bottom-right corner to jump to tags you do not own yet.
- 5Inside the collection grid, increase, decrease, edit, or remove quantities as needed.
Users can only sell or trade up to the quantity that currently exists in their collection.
Create sell or trade listings
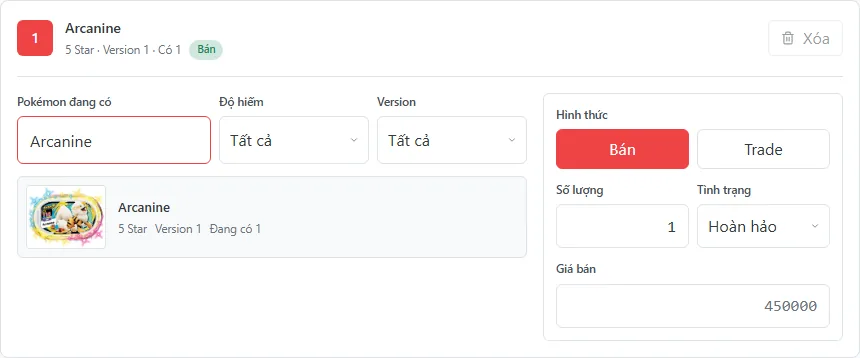
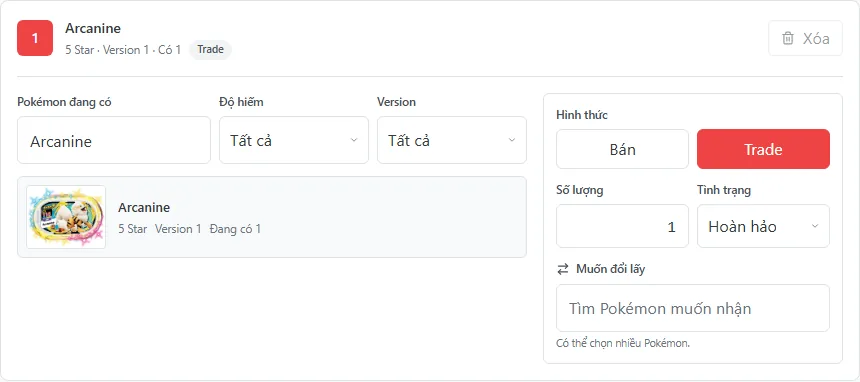
The /seller/listings page lets users create sell or trade listings directly from their own collection.
- 1Make sure the collection already contains tags and the profile has a valid Facebook or Zalo link, or enter a listing-specific link.
- 2Choose a tag that exists in your collection.
- 3Select Sell to enter a VND price, or Trade to choose wanted tags.
- 4Enter quantity, tag condition, and an optional custom contact link.
- 5Submit the row to create the listing.
When a listing is created successfully, the listed quantity is deducted from the collection so the same tag cannot be over-listed.
Manage active listings
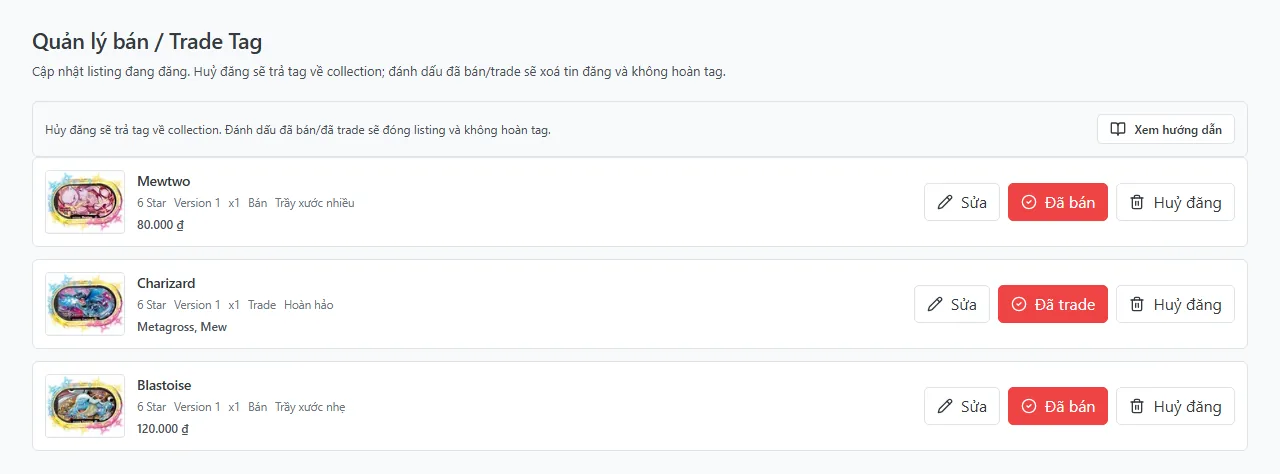
The /seller/listings/manage page is used to edit active listings, cancel them, or mark them as sold or traded.
- 1Open the avatar menu and choose Manage sell / trade listings.
- 2Update the tag, quantity, type, condition, price or wanted tags, and contact link when needed.
- 3Use Cancel if you want to close the listing and return the quantity to the collection.
- 4Use Sold or Traded once the deal is complete and no tag should be returned to the collection.
Cancel returns the quantity to the collection. Sold or Traded closes the listing without returning the tag.
QR Trainer
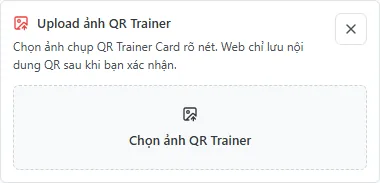
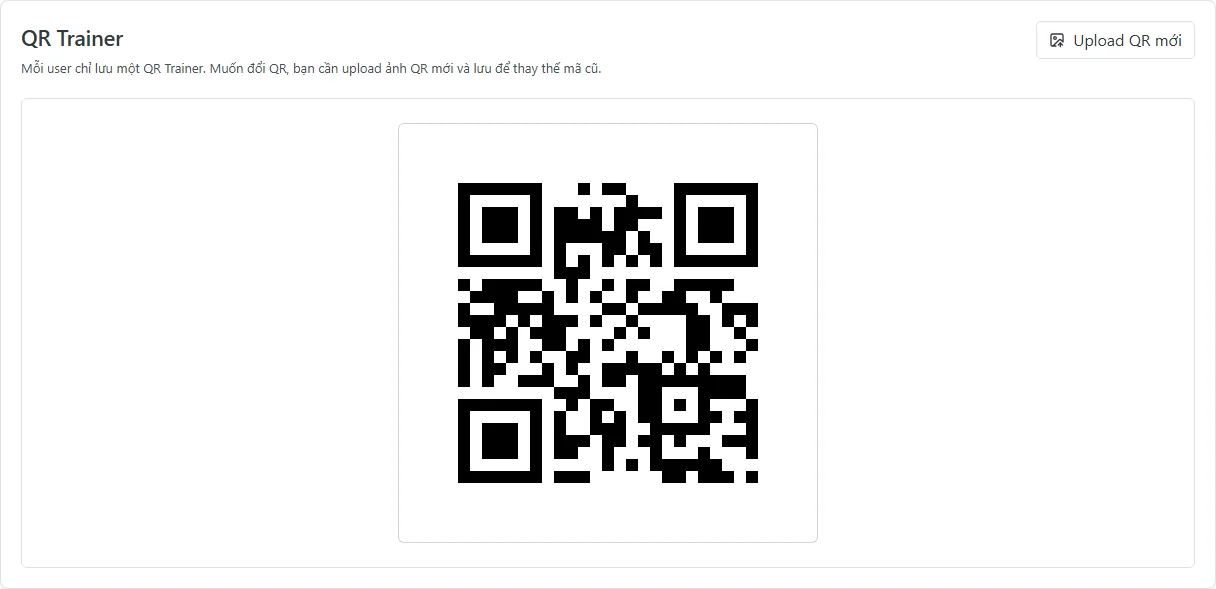
The /qr-trainer page lets a user store one personal QR Trainer by uploading an image of a QR Trainer Card.
- 1Sign in and open QR Trainer.
- 2Upload a clear QR Trainer Card image without clipped corners.
- 3Review the payload read from the image.
- 4Save the QR Trainer or replace the previously saved QR.
- 5Open the saved QR in full screen when you need another player to scan it.
Uploading a new QR replaces the currently saved QR Trainer for the active account.
Battle Assist
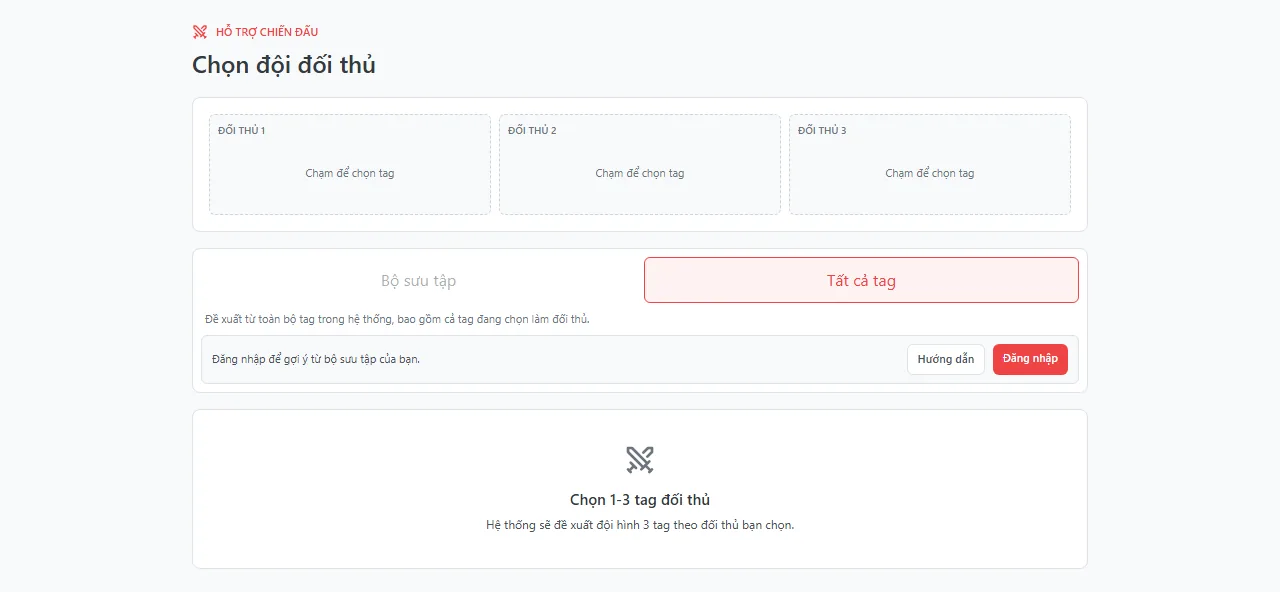
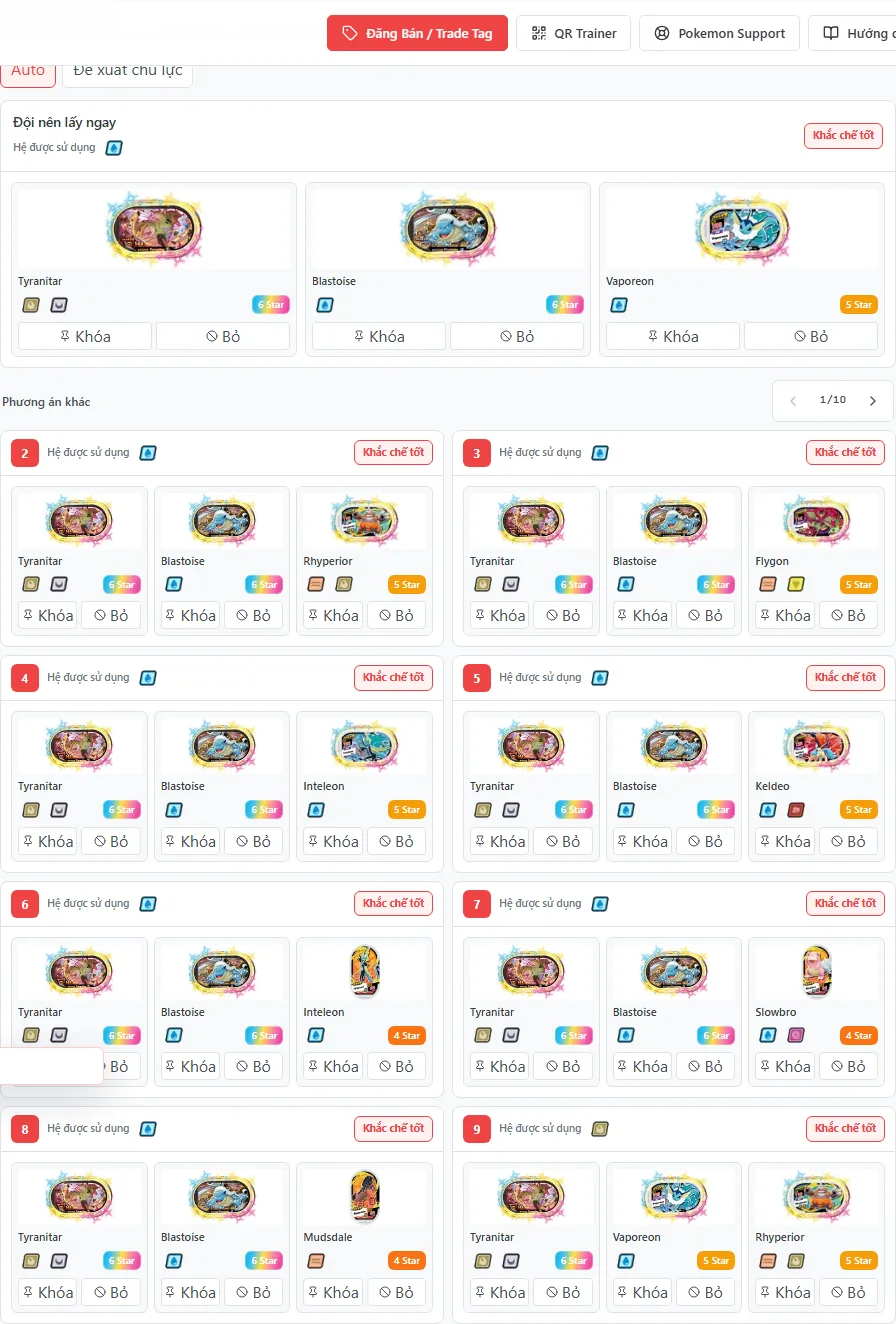
Battle Assist at /fighting recommends a three-tag team to counter one to three enemy tags, using either the full catalog or the user collection.
- 1Pick one to three enemy tags in the Opponents area.
- 2Choose the suggestion source: all tags or your collection.
- 3Review the recommended team and alternative lineups.
- 4Use Lock to keep a core tag or Skip to exclude a tag from suggestions.
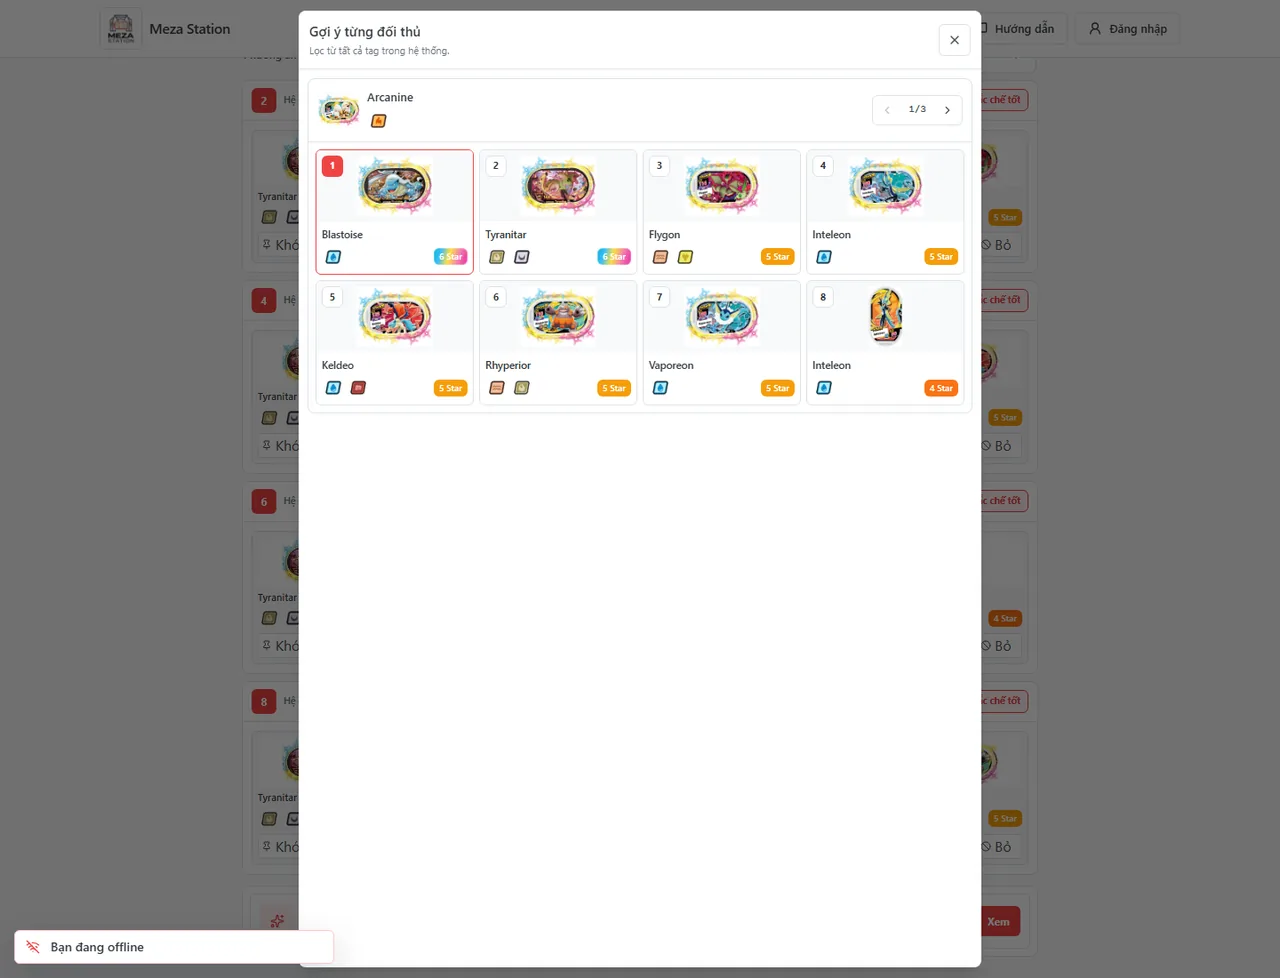
- 5Open per-opponent suggestions to see why each recommendation is shown.
If you choose the Collection source, the app only recommends tags that exist in the signed-in user collection.
Pokemon Support, Z-Moves, and type chart
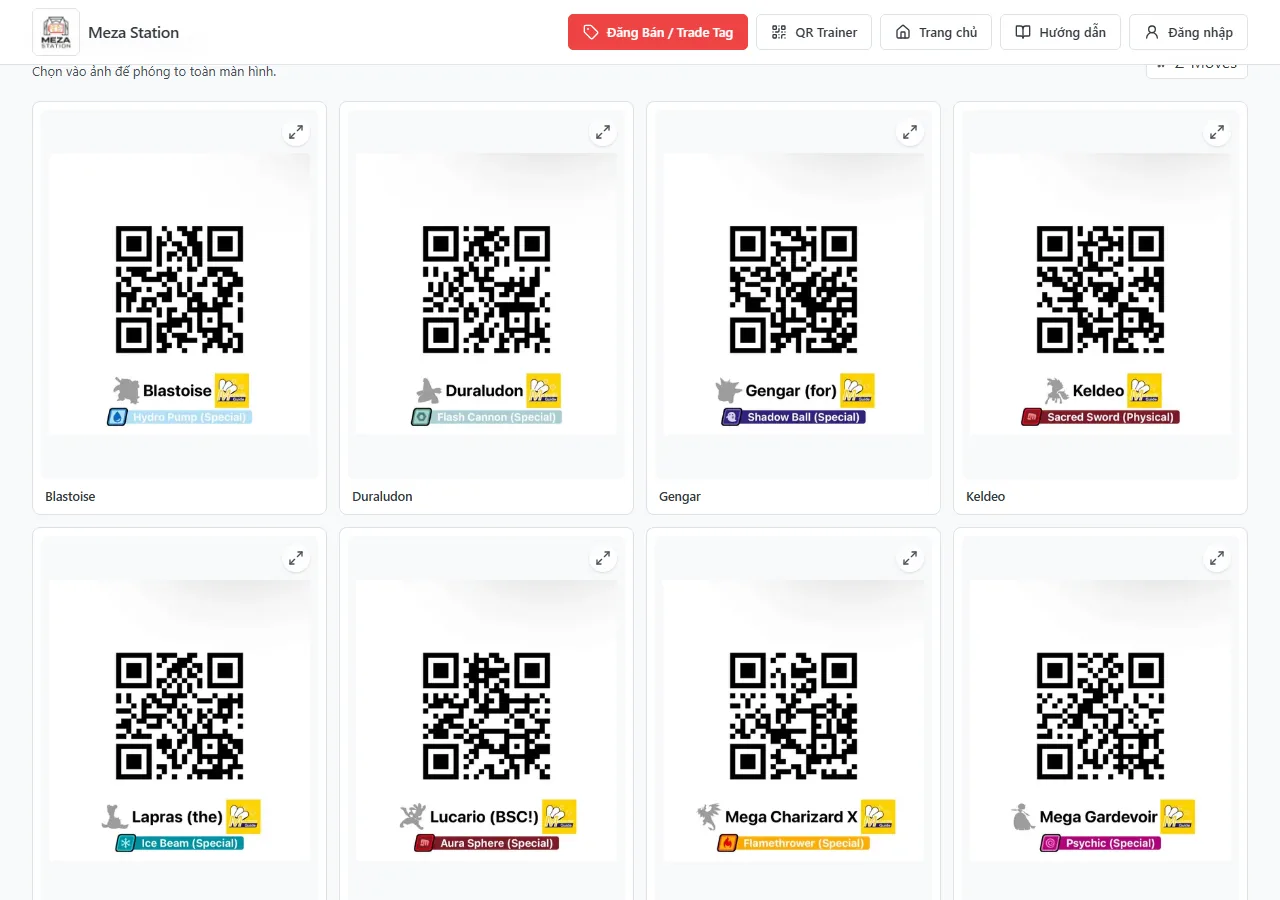
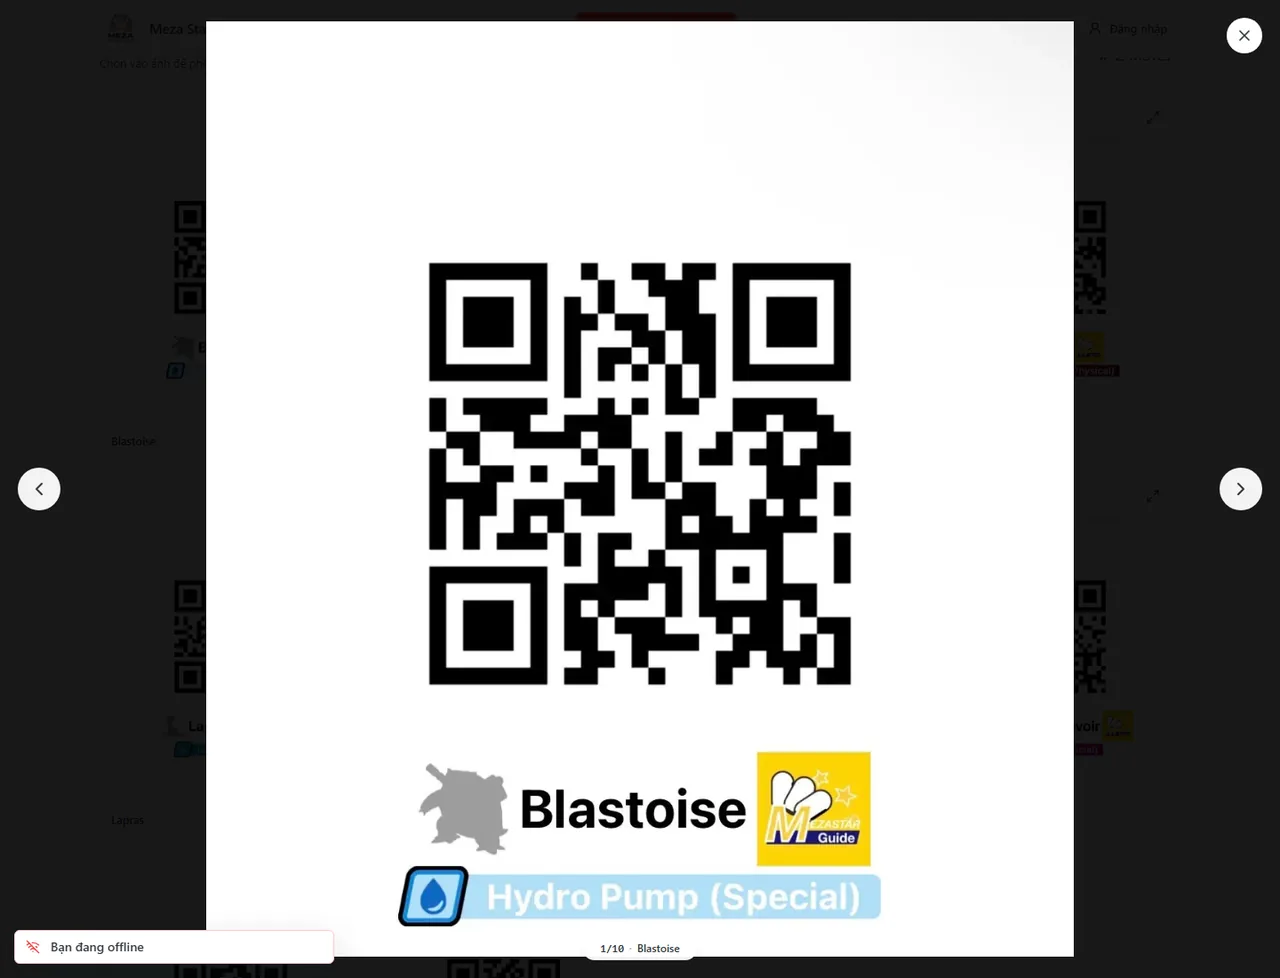
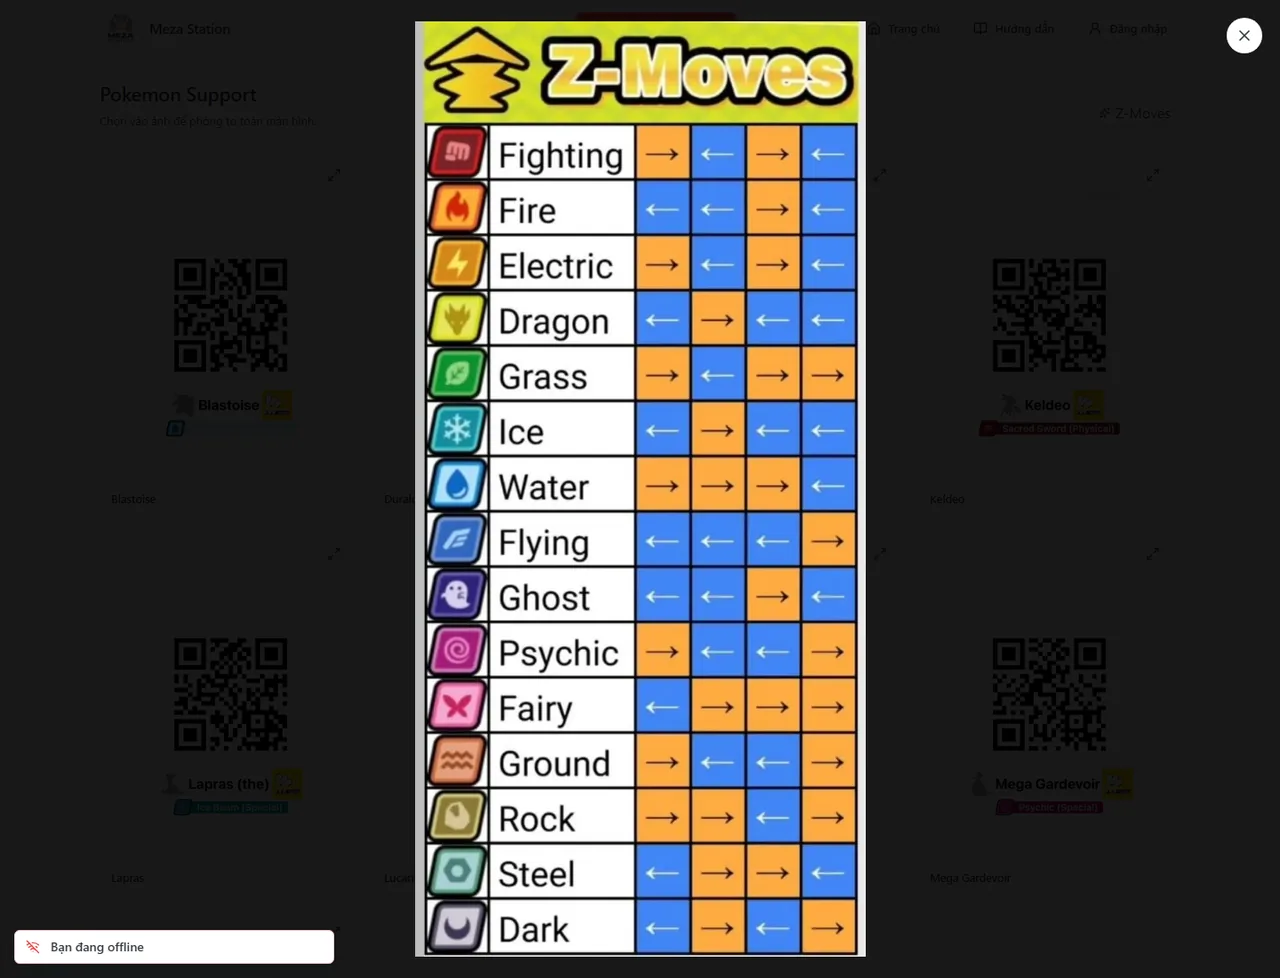
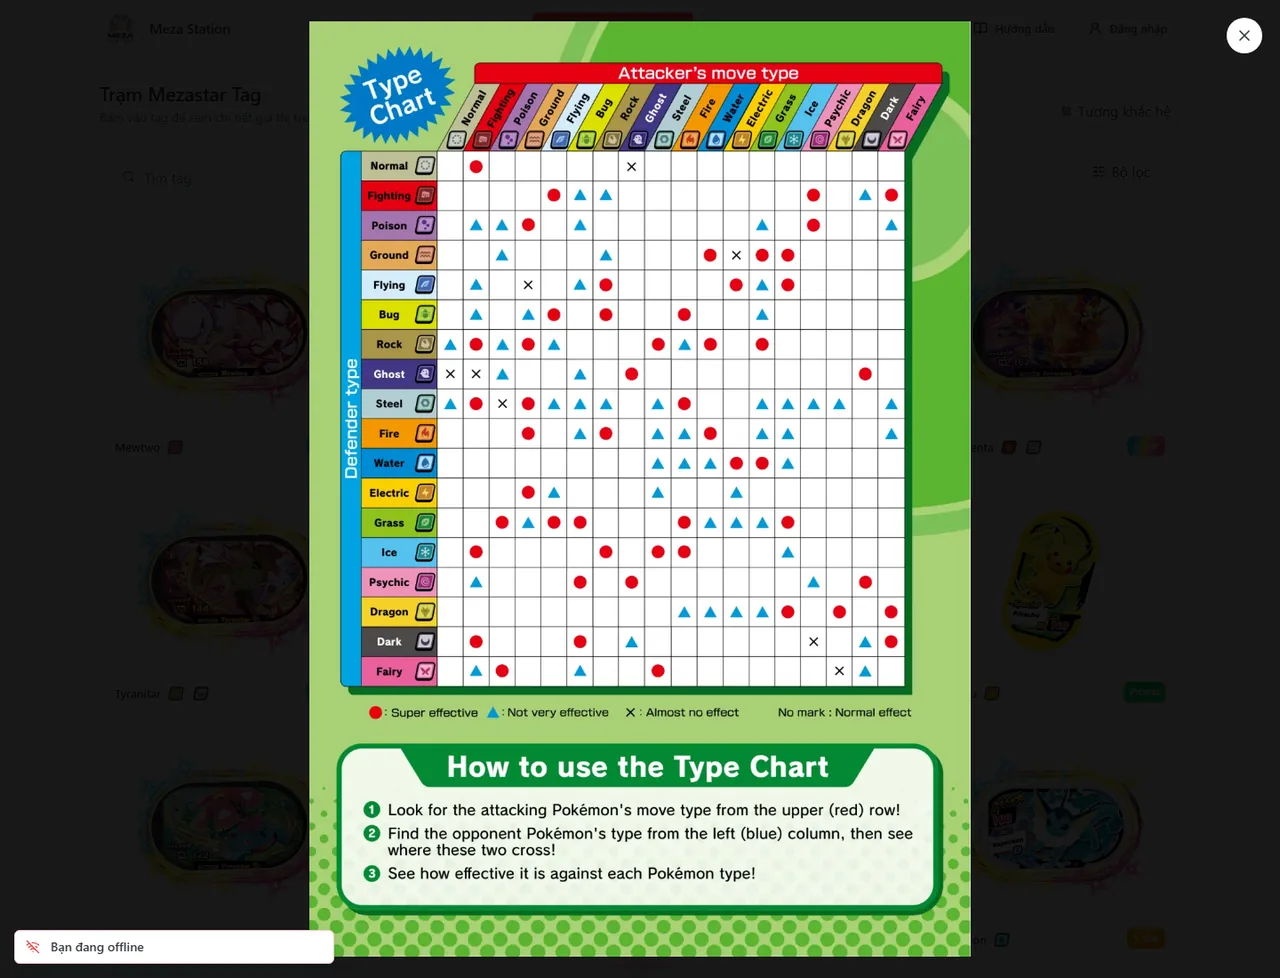
The /pokemon-support page contains the Pokemon Support QR image gallery, the Z-Moves modal, and the Pokemon type chart.
- 1Open Pokemon Support from the header.
- 2Click an image to open it full screen.
- 3Use previous/next buttons, arrow keys, or swipe on mobile to switch images.
- 4Open Z-Moves to view the Z-Move reference board.
- 5Open the type chart when you need matchup guidance while building a team.
Frequently asked questions
The FAQ covers common questions about the marketplace, collection, listings, QR Trainer, and Battle Assist.
- 1Read the FAQ before creating listings or contacting sellers if any operating rule is still unclear.
Does Meza Station handle payments on the website?
No. Meza Station only provides the catalog, collection, and listing surfaces. Buyers and sellers contact each other, negotiate, and complete payment through Facebook, Zalo, or another external channel.
Why do I need to add tags to my collection before listing them?
The collection is the source of truth for which tags the user owns and in what quantity. When a listing is created, the listed quantity is deducted so the same tag cannot be listed beyond what the user actually owns.
What is the difference between Cancel and Sold / Traded?
Cancel closes the listing and returns the tag quantity to the collection. Sold or Traded closes the listing without returning the tag because the transaction is treated as completed.
Can I list multiple tags at the same time?
Yes. The sell/trade form supports multiple listing rows. Each tag should normally appear in one row, and duplicate copies should be represented by increasing the quantity in that row.
What counts as a valid contact link?
A valid contact link starts with https://facebook.com/, https://www.facebook.com/, or https://zalo.me/.
What data does QR Trainer store?
QR Trainer stores the payload read from the current account’s QR Trainer Card image. Each account can keep one saved QR Trainer at a time.
Where does Battle Assist get its data from?
Battle Assist can recommend tags from the full catalog in the current system, or from the signed-in user collection if the Collection source is selected.